

The secret ingredient this round is cardboard boxes. I have a submission in the works, but thinking about cardboard made me remember these little lovelies:

I made them last summer (maybe the summer before? I can't remember exactly and the date stamp on our old camera says every picture was taken in 2005) for my MIL.
My neighbor had some scrap wood that she had made this set of blocks from:
I had planned to cut the wood and make blocks like hers, but, my impatience got the better of me and I just started working with what I had: cardboard! I used the wood blocks as the base, but you could apply the same concept to a frame or even another chunk of cardboard if you don't have wood scraps available.
I made these back before I was doing the blog thing, so I didn't take pictures of the process, but I'll intersperse the construction info with pictures of the blocks so your eyes don't glaze over too much with all that text....
What you'll need
- wood blocks (mine were 4x4s about 8 inches long)
- a corrugated cardboard box
- scrapbook paper
- craft paint
- staple gun
- box cutter or scissors
- glue stick
- a computer and printer
 |
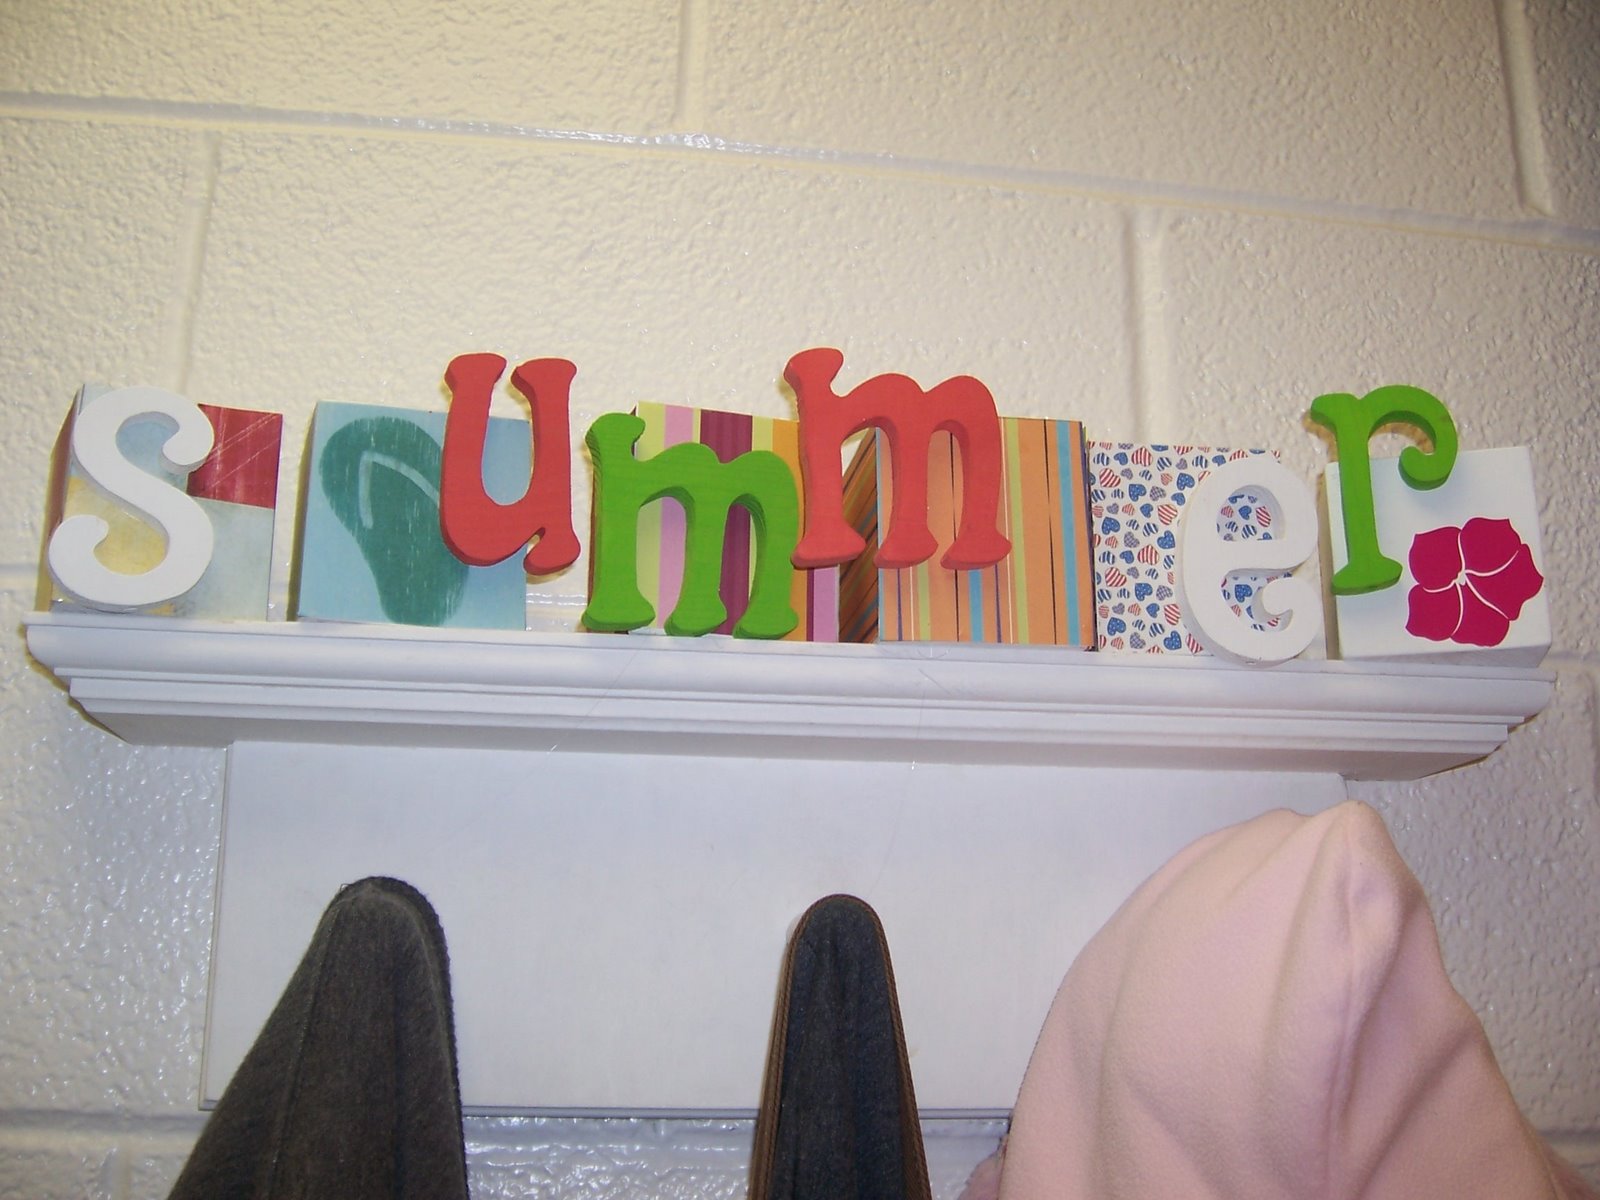
| summer... my favorite block of them all! |
- Sand each block and then paint them the colors you want. I used 2-3 coats of paint on each.
- On your computer, type the word(s) that you want on your block(s) in the font(s) and size that you want and print them on plain computer paper.
- You can save some ink by selecting the words and selecting Outline from the Font Effects in the Font pop-up window.
- Find clipart (or draw) any shapes that you want, such as the tulip, watermelon, leaf, and snowflake. Print them too.
- Paste your printed/drawn letters and shapes on your cardboard box.
- Using a box cutter, cut carefully around each of the letters and shapes to make a cardboard letter or shape.
- If you have shapes with multiple "pieces" like my watermelon and tulip, just cut out the main shape. You'll differentiate the pieces when you cut the scrapbook paper.
- Trace the letters and shapes on to your scrapbook paper and cut them out.
- Trace the letters/shapes face-down on the back of the paper and cut just outside that tracing line so you have some room for error and so that your paper will completely cover the cardboard.
- If you have shapes that are multiple colors, like my watermelon and tulip, cut those separate paper colors now.
- Staple the cardboard shapes and letters to the blocks (making sure that the paint has dried fully).
- If you are putting letters on top of shapes like I did with the watermelon, the leaf, and the snowflake, staple the shapes that will be underneath first and staple the letters after you have covered that shape with the paper (step 8)

winter... the sparkliest block AND season - Glue the paper shapes and letters securely on top of the cardboard shapes.
 |
| spring... my almost-favorite season |
 |
| fall... my favorite season, but my least favorite of the blocks |
So.... whaddya think? Iron Crafter worthy? I'm planning to enter the project that I have in the works right now, but maybe if I can submit two entries...
Update: I have confirmed that multiple entries are allowed! Woohoo! Iron Crafter here I come...


2 comments:
I think they are darling! you need to enter them! They are way cuter than a lot of the projects!
Those are so cute and look so easy!!! LOVE that, you're so creative!
Post a Comment