Showing posts with label recipes. Show all posts

Pin Test: Lunch Lady Peanut Butter Bars


I am not a great cook. Not an accomplished baker. (My butchering and candlestick making skills also leave something to be desired. No rub-a-dub-dubbing here.) So when I'm looking to try out a recipe, I don't take on anything too risky. No uncommon ingredients, no fancy techniques.

And yet somehow, even with the simplest recipes, I manage to foul something up. It's a special talent I have.

These Lunch Lady Peanut Butter Bars from Tried and Tried Again are simple enough. I even followed the directions exactly. (Crazy substitutions and "winging it" are my prime methods of fouling things up.)

But somehow, my chocolate frosting... was not chocolatey. Just sugary. I am blaming the fact that my cocoa was older than my marriage (6 years... that's how much I bake from scratch...). Thankfully, however, the lack of chocolatey goodness was quickly remedied by a quick layer of melted chocolate chips on top. And, for the first time EVER, I did not burn the chocolate as I melted it! Baby steps. :)


Even with this peculiar double-frosting layer, these peanut butter bars were ah-MAH-zing. Every bit like every wonderful grade school memory, minus the sweet lunch lady in the hairnet and the helping of mushy green beans.

Reading through the comments on the recipe, no one else seems to have had the same frosting trouble. So, chalk it up to my special set of culinary skills, and head on over to Tried and Tried Again for the recipe.

Have a happy day,
Lorene

Toffee Apple Dip


Warning: even though you eat it with apples (or strawberries or other fruit)... this dip is not good for you. It is fats and sugars working together to reach the pinnacle of simple deliciousness.

But all warnings aside... this dip is totally worth it! You can use fat free/reduced fat cream cheese and reduce the amount of sugar to help lower the calorie content, without affecting the taste or texture. This is my go-to party dip because it is quick to put together and it's popular enough that I never end up bringing any home :)

In a medium bowl, mix
  • 1 - 8 oz block of (softened) cream cheese
  • 1/4 to 1/2 cup brown sugar
  • 1/4 to 1/2 cup granulated sugar
  • 1 tsp vanilla
Once the cream cheese and sugars are mixed well, stir in half a bag of toffee bits (approximately 1 cup -- I use Heath bits, found by the chocolate chips on the baking aisle).

I love to serve this dip with a variety of sweet and tart apples for variety, but Debra loves it with strawberries. I'm pretty sure it makes every fruit better :) To keep the cut fruit from going brown before I serve it or throughout the party, I put a little bit of lemon juice on them. This does make the fruit taste a little lemony (which I don't mind at all) but for the next party, I'm going to try one of these four ideas from The Yummy Life to preserve them without messing with the flavor. 

-Lorene

Peanut Butter Popcorn: A Holiday Tradition

Good morning! I'm over at Housewife Eclectic today sharing about my holiday traditions, so here today I'm going to share a recipe for one of them: peanut butter popcorn. (I originally shared this recipe last year as part of Holiday Treat Week with Tricia over at Leafy Treetop Spot.)


FAMILY.
Me and 6 of my 7 older siblings, plus my dad and his new car
I'm the cute chubby one in pink :)

While not inherently holiday-ish, this delicious treat is all about family and isn't that what the holidays are really all about?

Let me introduce you to Peanut Butter Popcorn:

It might not look like much, but it's delicious, sinfully sweet, and cheap!

I grew up the youngest in a family of 8 children (as you can see from the picture above). Cheap is important. Cheap and makes enough for everyone is the difference between living in harmony and... not-so-harmonious living. A harmonious day is a holy day and therefore a holiday, right? :)

So, at our weekly family-together nights and any other family gathering, my mom would make Peanut Butter Popcorn. It's perfect for making with a large brood because there's a job for everyone. It's actually more difficult to make by yourself than with a helper, so grab a helper or two (or six) and let's get started:


You'll need
  • Popcorn -- 2-3 servings, kernels with an air-popper are best, but the microwave bags are fine
  • A big metal bowl
  • Your oven
  • Another big bowl, in any material
  • A saucepan
  • 1 cup peanut butter -- chunky or smooth, doesn't matter
  • 1 cup granulated (white) sugar
  • 1 cup corn syrup
  • 1 tsp vanilla
1. Preheat your oven to 275*F  or so. Place the big metal bowl in the oven and turn the oven off. (You want the bowl and the popped corn to stay warm because that makes it SO much easier to evenly distribute the topping.)

2. Start one helper popping popcorn into the non-metal big bowl.

3. After the first batch of popcorn is finished, have another helper shake the bowl so that the biggest, fluffiest kernels come to the top and the yucky unpopped "old maid" kernels fall the bottom.

Yup, my family togetherness memories are based on an elitist popcorn hierarchy. :)

4. Carefully remove the *hot* metal bowl from the still-warm oven. This is a good job for a parent or an older helper.

5. Enlist a helper (or two) to scoop the fluffy kernels off the top of the bowl, using their hands, and place the the fluffy, high-class popcorn in the metal bowl, being careful not to touch the bowl since it is still *hot*.

6. Dump all the old maids and the smaller lower-class kernels that are left in the bottom of the bowl. Return the metal bowl to the still-warm oven to keep the bowl and popcorn warm.

7. Employ your helper(s) in popping another 1-2 additional batches of popcorn and give those the same elitist treatment, returning the high-class kernels in the metal bowl to the oven after each batch.

8. When you've sorted the final batch of popcorn and your metal bowl is about 2/3 full (probably about 8-10-ish cups of popcorn), combine the vanilla, sugar, and corn syrup in the saucepan. (Another job for a parent or older helper.)

9. Heat the sugary goodness until it boils and the sugar is completely dissolved.

10. Remove the boiling sugary goodness from the heat and quickly add the peanut butter, stirring until it's all melted into the sugary mixture.

11. Carefully remove the hot (possibly warm by now) metal bowl from the oven and quickly pour the *very hot* peanut butter sauce over the top.

12. Stir...

13. Stir... this is a good time to have helpers. :)

14. Stir some more. Make sure that the peanut butter sauce is evenly distributed and covering every fluffy kernel.

15. Now you make a choice: keep stirring until the sauce is completely cooled OR spread the cooling popcorn onto waxed paper.

You could also form the popcorn into balls, but leaving the still-warm popcorn in the bowl sends most of the still-warm peanut butter sauce to the bottom of the bowl, making it hard to get OUT of the bowl, both to eat and to clean. :)

16. Enjoy! Share with family, friends, the UPS man (for bringing all those fantastic holiday packages), or whoever.You could even add it on your Christmas Cheer Garland. :)

Mmm Mmm... Caramel Cake and Chocolate Pie from The Help {recipe & book review}

Last chance to enter to win a great purse organizer from Anything Adorable!
Giveaway ends today at noon (or at whatever point after that naptime starts :) so go enter now!

Have you read The Help? It's a great book, and perfect for a book group:
The Help
by Kathryn Stockett

The Help is the story of three women in the South in the 1960's -- two black maids and one white young woman.Their lives intertwine and the story is amazing, both for the historical aspects and for the characters. This book was fascinating to me -- and fascinating that this happened recently, from a historical perspective. I had to keep reminding myself that this was during my parents lifetime -- NOT over a hundred years ago. This was only 50 years ago!

Final word: A-. Fascinating and enthralling story. A great read, and it moves quickly especially considering that it's over 400 pages.

This was our book group selection for this month, and since I was hosting, yesterday, in a bout of baking insanity, I decided to try FOUR new recipes. That I had never tried before. To serve to company. I was going to push for five, but I knew that would just be tempting Fate too much. Since I was kind to Fate and only tempted her four times instead of five, she smiled on me and all of them actually turned out mostly edible! Woohoo!

Why four new recipes? Because food plays a large part in The Help. And I don't bake much so it's not hard to have recipe that are new to me. :)

First up:

Homemade pie crust (my first ever!)
with made-from-scratch Demetrie's Chocolate Pie
topped with Cool Whip
(because I enjoy the irony of topping the handmade goodness
with the most processed product on the planet)

The pie crust turned out well, especially considering it was my first pie crust ever in my whole life. The chocolate pie was good, but tasted VERY bland next to the caramel cake. It could have used a bit more sugar, and I even subbed half-and-half cocoa and powdered sugar for the sweetened cocoa and added an extra 1/3 cup sugar. But it was pretty easy and set up well -- good texture.

If you've read The Help, you probably think that it's disgusting that I made chocolate pie. But the recipe is straight from the author and, really... I left out Minny's special ingredient. :)

Whether you've read the book or not, you'll love this cake, the star of the night:

The cake was dense like a pound cake, but moist and just the right amount of sweet. The icing was, for this cake, too sweet and overpowering. And made WAY more than I needed to ice my two 8" rounds. But I will definitely be making the cake again (and probably trying the glaze). As it is, I'm eating around the frosting to eat just the cake. :)

So, in summary:
Read The Help
and make this caramel cake.
All others optional. :)

Taco Soup {it's like magic...}

Today I'll show you a simple housewife magic trick...

how to turn this basket of canned food...
into this easy and hearty anytime meal!

This taco soup is a staple at our house. We use the term soup loosely, however... It's thick enough that it's more of a glorified chip dip that serves as a full meal for us. :)

We eat this meal all year long, but it's especially nice for the fall and winter when the evenings are cooler... and the football games are on TV. ;) I've also given the makings for taco soup (minus the meat) as a wedding or high school graduation gift. Give it with a slow cooker and you've got a great gift!

 The thing I love most about this recipe is that it is completely modular to what you like, what you have on hand. or what is on sale: you can use any kind of beans you like (canned or dried) and any kind of meat you like, from ground beef to chicken chunks. Toss it in your slow cooker and dinner's ready in a few hours!

Taco Soup
makes 4-6 hearty servings (enough to fill my 3-quart slow cooker)

What you'll need

  • 2 cans condensed tomato soup
  • 2 cans (or about 4 cups) kidney beans (or any kind of beans, really)
  • 1 can corn
  • 1 pound ground beef (or turkey, sausage, pork, etc), browned and drained
  • 1-2 Tbsp taco seasoning
  • optional add-ins:

    • 1 can diced tomatoes (with or without green chiles)
    • 1 can diced green chiles
    • half a medium onion, diced and cooked with the hamburger
    • chili powder, to taste
    • 1/2 cup salsa
    • 1 pound cooked chicken chunks (sub for ground meat)

What you'll do
  1. Open all 5 cans. Drain the can of corn (unless you'd like your soup to be a little soupier) and rinse the beans (to reduce the sodium).
  2. In your slow cooker, stir together the tomato soup, corn, and beans. 
  3. Add 1-2 Tbsp of taco seasoning, to taste.
    • If you'd like more of a kick to your soup, reduce the taco seasoning and just add some straight chili powder.
  4. Heat on low for 3-4 hours.
  5. About half an hour before serving, add the browned ground beef.
    • Adding the ground beef just before serving prevents it from going softer and turning a little mushy as it cooks. If you brown and freeze your ground beef like I do, add your frozen ground beef after you add your seasoning so that it has time to thaw and reach proper temperature.
  6. Serve with sour cream, cheese, and tortilla chips.

3-Way Cheesecake: Lemon - Lime - Raspberry

Cheesecake and meatballs have two things in common (at least at our house):
  1. Until recently, I thought that both were difficult to make and required a chef more gourmet than I. (Because watching Iron Chef America is as close to gourmet as I get.)
  2. They are both infinitely more fun made in miniature. (see my mini meatloaf recipe here)
The first baked cheesecake I ever made followed this recipe from Kraft. It was such a smashing success that I've gained the confidence to tweak the recipe and make it my own (including halving it so that I don't feel guilty eating the whole thing ;). So now, instead of just a lemon cheesecake, I can use the same recipe to make lime and raspberry cheesecakes as well.

Cheesecake is my go-to "impress" dessert, and it only adds to the wow factor to have cheesecake in three flavors. Instead of making three batches of cheesecake, though, I take a shortcut and make one cheesecake base and then divide and stir in three different flavors. There, now you have the secret to all of my powers. ;)

3-Way Cheesecake
makes approximately 18 muffin-sized and 24 mini-muffin-sized cheesecakes
OR six of the smaller 4-inch square pans shown here
OR two 8" pie rounds
OR double to make one 9x13 

What you'll need:
  • Prepared graham cracker crust(s) in whatever size(s) you want
  • two 8-oz packages cream cheese, softened
  • 1/2 cup sugar
  • 1/2 cup sour cream
  • 2 eggs
  • Juice and zest (or grated peel) from 1 lemon
  • Juice and zest (or grated peel) from 2 limes
  • 1/3 cup mashed raspberries and juice
*I love a cheesecake with strong flavor, so if you want a more subtle flavor, consider using less juice/zest.

*If you want only one of the three flavors, such as for making a single 9x13, triple the amount of lemon lemon/lime/raspberry to 3 lemons, 6 limes, or 1 cup mashed raspberries. Then skip dividing the cheesecake base.
What you'll do:
  1. Beat cream cheese and sugar in a large bowl until well blended.
    • If your cream cheese hasn't had time to soften, you can help it along by microwaving it at 50% power for 20-30 seconds. Be very careful not to melt it though!
  2. Add sour cream and mix well.
    • Mix VERY well at the risk of  your sour-cream-hating hubby (or anyone else) gagging and never wanting to each your cheesecake again after finding a lump of sour cream. Lesson learned.
  3. Add one egg at a time and blend well after each.
  4. Divide cheesecake base evenly into three bowls.
  5. Add the lemon juice/zest to one bowl of cheesecake base, the lime juice/zest to the other, and the raspberry mash to the last; stir well.
  6. Pour over crust(s).
    • For muffin tins and mini-muffin tins, using a measuring cup and tablespoon to ladle the cheesecake into the tins makes much less mess. 
  7. Bake cheesecake(s) at 325*F for approximately 20 minutes, or until center is almost set. (If the center is set, the cheesecake is overcooked and will probably crack. For more tips on preventing cracks and getting a perfect cheesecake, read this article on What's Cooking America.)
    • For mini cheesecakes (muffin and mini-muffin), bake approximately 12-15 minutes.
    • For a 9x13 cheesecake, bake approximately 40 minutes.
  8. Refrigerate 4 hours or overnight... or eat it as soon as it cools to room temperature because you just can't help yourself. 
  9. Garnish before serving, because if I've learned anything from Iron Chef America it's that plating and appearance are worth 25%. :)
    • For the smaller cheesecakes, the easiest garnish is a few crumbs of leftover graham cracker crust, sprinkle on before baking.

In a family taste-test, no one flavor prevailed. Each taste-tester preferred a different flavor. I love when that happens. :)

**linking up to Housewife Eclectic's Tasty Tuesday party**

Easy Graham Cracker Pie Crust

We are a graham cracker pie crust family. There are two very good reasons for this:
  1. I am afraid of making traditional pie crust and too cheap to buy premade pie crust.
  2. We don't really love traditional pie crust... but we love the buttery goodness of a graham cracker pie crust!
The Mr loves pudding pies. And cheesecake. (We both do!) Pretty much any pie or any filling or any dessert-stuff can be put on a graham cracker crust and be marvelous. (Fruit pies may be an exception, but we don't really eat cooked fruit at our house either...)

My grandma made the most delicious no-bake cheesecake with divine graham cracker crust. I'll share the cheesecake recipe later, but here's Grandma's recipe for the best-ever graham cracker crust.

Grandma's Graham Cracker Crust
makes one 9x13 crust or one pie crust

What you'll need:
  • 2 packages graham crackers (or appx 2 cups graham cracker crumbs)
  • 8 Tbsp (1/2 cup) butter or margarine, melted
  • 1/4 cup sugar
If you need more or less crust for different pan sizes, adjust the amount of crackers/crumbs to what you think you'll need and then adjust the butter so that you have 1 Tbsp for each 1/4 cup of crumbs. Err on the higher side, because once you add the butter, the game's over -- adding more graham cracker crumbs after that will make your crust unevenly textured... like mine in the photo above. :) The first round of graham crackers soak up the butter, so the second round stays dry. Still edible enough that your family won't notice the difference, but it doesn't look as good for sure!

What you'll do:
  1. Place the graham crackers in a large ziploc bag and crush with a heavy can or a rolling pin.
    • This is my favorite part! An excellent ending to a frustrating day. :)
  2. Place the graham cracker crumbs in a medium bowl.
  3. Add sugar to crumbs and mix well.
  4. Add the melted butter/margarine to the crumbs/sugar mixture.
  5. Stir thoroughly with a fork.
    • The mixture should be well mixed but still a bit crumbly.
  6. Place crumbs in your pan.
  7. Press the crumbs firmly into place using your fingers, a measuring cup, or whatever other tool you deem necessary.
  8. Bake at 350*F for 8-10 minutes or until the crust is just barely toasted.
    • For mini muffin or muffin-sized crusts, cut baking time to 6 minutes or less.
  9. Cool crust completely before adding pie/cheesecake/yumminess filling.  
And now I'm going to tease tantalize you with this delicious cheesecake number... in three flavors... lemon... lime... raspberry... recipe next week... :)

Yummiest Ever Chicken Salad Sandwiches

*And when I say yummiest ever, I mean the only chicken salad that I will eat, let alone gorge myself on. :)

Chicken salad sandwiches are a summertime staple at our house. They're yummy, healthy (ish), and easy. Plus they seem fancy, so we make them when we have company over and don't want to heat up the house with a real fancy meal.

For me, chicken salad sandwiches are all about texture, so the adjectives in the ingredient list are very important -- the crunch is what makes the sandwich the yummiest ever instead of just good. :)

What you'll need:

2 lbs chicken meat -- the more bones you have (bone-in, wings/thighs, etc), the higher poundage you'll need
1/2 lb firm grapes
1-2 stalks crunchy celery
1 crisp apple
3/4 cup light mayonnaise (real mayo... no miracle whip)
1 tsp garlic salt (to taste)
1 dozen large croissants

  1. Cook and shred the chicken.
    • I always boil my chicken because I can boil a large amount and then freeze whatever shredded chicken I don't need for the current recipe.Then I just have to thaw the chicken for the next recipe.
  2. Let the chicken cool completely.
    • It shouldn't be warm at all when you start adding the rest of the ingredients, so I boil and shred the chicken the night before and let it cool overnight in the fridge.
  3. Stir in mayonnaise, more or less than 3/4 cup depending on how moist you want it... I lean towards the dry side. 
  4. Sprinkle and mix in garlic salt.
    • You want to have enough garlic salt that it affects the flavor of the chicken salad, but not so much that you can actually taste the garlic. If in doubt, use less than you think you should.
  5. Chop apple, grapes, and celery into small pieces and stir in to salad.
    • The portions listed here will make the salad about a 50-50 split of chicken and crunch (from the apples, grapes, and celery), which is just how I like it. Add more or less to your liking.
  6. Chill the chicken salad in the fridge until ready to serve.
  7. Slice each croissant in half and stuff full of chicken salad. 
Delicious! Not only is this yummy, but it's easy. And good for leftovers the next day (although the sandwiches are best if assembled just before eating so the croissants don't get soggy). That is a requirement at our house. Without leftovers, The Mr. is left with PB&J for lunch. :)

    French Bread Pizzas

    These french bread pizzas are one of my husband's favorite meals that his mom makes. The first time I tried them... I didn't like them. I like my pizza crust soft and chewy, so the crispy french bread wasn't my thing. I experimented with cutting the bread differently so it wasn't as crispy, and now I love them! Major bonuses for being easy and inexpensive.


    French Bread Pizzas
    makes 8-10 mini pizzas

    1 loaf french bread
    1 pound ground beef*, cooked and seasoned to taste (we brown ours with some onion and then freeze it, so all we have to do is thaw the meat for dinner)
    1 small jar pizza sauce (or make your own using the recipe below)
    1/2 cup each grated cheddar cheese and grated mozzarella cheese, combined

    *or ground turkey, ground sausage, pepperoni, or whatever you like on your pizza

    1. Preheat oven (or toaster oven if you're blessed to have one) to 350*F.
    2. Slice the french bread, either into regular slices (like my bakery cuts mine, by request) or B) into fourths that are then sliced in half (so that the outside crust of the french bread becomes the crust of the pizza). --see images below for notes about cutting french bread if you don't understand what in the world I am talking about :)--
    3. Spread a thin layer of pizza sauce on the french bread. Thinner sauce = crispier pizza
    4. Add your toppings! We put a layer of cheese, then meat, then more cheese.
    5. Bake at 350*F for 5-7 minutes, until cheese is melted. Let pizzas cool for a couple minutes before eating.
    Cutting option A: Regular slices. This makes the center of the pizza softer, just like I like it.

    Cutting option B: First cut the loaf into four pieces (green lines) and then cut each of those pieces in half through the center of the loaf (orange line). This is makes the whole crust crispier.

    Super Easy Pizza Sauce
    makes enough sauce for 2 regular size pizzas or 2 full loaves of french bread pizzas

    1 can tomato sauce
    1 Tbsp italian seasoning
    1/8 tsp garlic powder
    1 Tbsp olive oil

    Combine all ingredients. Spread on your crust, bake, and enjoy!

    Mini Meatloaves

    Until recently, I thought that meatloaf was very difficult to make, requiring very precise ingredients, and the hand of a gourmet chef (or at least one better than I). Then I made it for the first time. And it turned out great! If I can make a recipe successfully on the first try, anyone can make the recipe!

    I have come to love making meatloaf (and meatballs) because I can have the freedom to add whatever I want and whatever I have on hand. My first excursion into Meatloaf Land followed this recipe by Kraft Foods, but since then I have altered it slightly. My hubby pronounces these "good enough that they don't even need to be dipped in more barbecue sauce."


    Mini Meatloaves
    makes 12 muffin-sized meatloaves

    2 lbs ground beef (or pork or turkey)
    1 6-oz pkg StoveTop stuffing (any flavor)
    2 eggs
    1 cup water
    3 green onions, chopped
    3/4 cup barbecue sauce
    1/2 cup grated cheddar cheese
    1. In a large bowl, mix ground beef, StoveTop, eggs, water, green onions, and 1/2 cup barbecue sauce. (I don't like touching the raw meat any more than I have to, so I use my potato masher to mix this part. :) )
    2. Fill 12 greased muffin cups with the meatloaf mixture. 
    3. Top the meatloaves with a thin layer of the remaining barbecue sauce. (I used a pastry brush.)
    4. Bake at 400*F for 30 minutes or until the meatloaf reaches 160*F.
    5. Top with grated cheddar cheese and bake for 5 more minutes or until cheese is melted.
    Tada! Our grocery store had a great sale on ground beef this week, so I also made a batch of meatballs (get my recipe here). I made these bite-sized, and I can't wait to try them out in our albondigas on Monday! (We're mixing things up for our Meatball Mondays--I'll let you know how it turns out...)


    From left to right: a mini meatball, a small Atomic Fireball (to sub for a marble since apparently we've lost all of ours...), a regular-sized meatball, and a golf ball. Just to show you a size comparison. :)

    Restaurant Ripoff: (Smothered) Sweet Pork Burritos

    First off, I apologize for the lack of pictures in this post. Apparently, I've never bothered to document the making of the sweet pork burritos. I am okay with this because the burritos don't exactly look like works of art when they are finished. But boy do they taste yummy!

    I love Costa Vida's Sweet Pork burritos. I could eat them every day of my life and never get sick of them. This sweet pork satiates my cravings without taking away from the bliss that is the Costa Vida Smothered Sweet Pork Burrito. This is perfect for us, because, as my sister said, "If it was a perfect replica, where would we eat when we go out?" :)

    I first based my recipe on this recipe and then altered it from there. I don't make the pico de gallo, so if you want that recipe, you'll have to visit there. :)

    Sweet Pork
    Pork roast (a 4-5 lb roast makes twice as much sweet pork as we will use for one pan of burritos, so I freeze half of the pork after step 2)
    1 cup brown sugar
    6-8 oz (half a jar) salsa (medium is best for our tastes)
    1. Place the pork roast in your slow cooker on low for 6 hours or until done. 
    2. Shred the pork and save the juice. [I either do this the day before I want to have the burritos or the day that I get the roast. The cooked and shredded pork and its juices can easily be stored in the freezer until you're ready to use it.]
    3. In the slow cooker, combine the shredded pork with the brown sugar and salsa and about 1/4 cup of the pork juices. [If your salsa has extra large chunks, you might want to run it through a food processor first.]
    4. Cook on low for 3-5 hours or until the pork seems properly infused with the sweetness and heat. [I usually stir once after about 2 hours and taste it to see if I want to add more brown sugar because I like my pork *super* sweet.)
    Cilantro Lime Rice
    1/4 to 1/2 bunch of fresh cilantro
    4 limes' juice (or appx 1/8 cup lime juice)
    1 cup rice
    2 cups water (or however much your rice cooker requires or you require to make the rice like you want)
    1. Finely chop the cilantro. {Tip: Twist the bunch of cilantro together, like a rope, and then chop it.}
    2. In a pan or your rice cooker, combine rice, water, lime juice, and cilantro.
    3. Cook until the rice is done.
    Assemble the burritos
    We make our burritos enchilada-style, covered in sauce in a pan that goes in to the oven. Gather your...
    Sweet pork
    Cilantro lime rice
    Black or pinto beans, cooked
    Shredded cheese
    Green enchilada sauce (14 oz can or larger)
    Tortillas (the larger the better)
    1. Fill each of your tortillas with small amounts of sweet pork, cilantro lime rice, and beans. You can also add some cheese and enchilada sauce to the inside of the burrito before you roll it if you'd like. 
    2. Roll each burrito and place it in a glass baking dish. 
    3. Slowly pour the enchilada sauce over the top of the rolled burritos, making sure that the sauce covers all of the tortilla. (You don't want crusty, dried-out tortilla once you take them out of the oven. Yuck!)
    4. Sprinkle the rest of the cheese on top of the burritos.
    5. Cover with aluminum foil.*
    6. Bake at 350 for 20-30 minutes.
    *A huge gold star to anyone who can tell me how to prevent the melted cheese sticking to the aluminum foil covering. Please?

    The wonderful world of Ramen


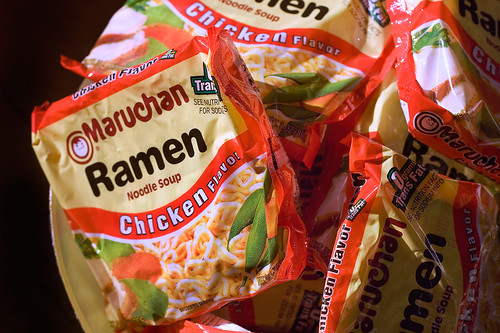
    As we speak,  I am eating these blessed noodles for lunch. For the third day in a row. I thought my times of Ramen were over once I was no longer a college student, but alas, tis not so.


    Everyone, at one desperate moment or another, has eaten Ramen. It's my belief that Ramen is what holds the universe together. But everyone Ramens (yes, I just made that a verb) differently.

    I used to babysit for a family that used Ramen as a snack. Hand your kid a package of Ramen and let 'em go to town dipping the broken up noodles in the seasoning packet.

    I had no idea until college that Ramen was supposed to be a noodle soup. I have always just boiled the noodles with the contents of the [chicken flavored] seasoning packet, drained the water, and ate the noodles.

    Ramen is not just for college kids [or lunch-lazy SAHMs like me] anymore, at least according to Ramenlicious. These enriched flour noodles have found a home in many traditional dishes such as

    meatballs
     

    angel food cake

    and snack mix.

    Ramen has also been paired with many pantry staples:

    Doritos
     

    Spam (everyone's favorite alternative canned meat)

    Even Jello is not safe...

    How do you Ramen?

    Why we love Chex (part 2)

    This treat is really common around the holidays, so I thought I'd make it for a simple treat to take to the neighbors. Well, with all the Christmas fun and chaos, that didn't happen, so I just made this earlier this week....

    I based my recipe off this one from Bakerella and then, like I do with *everything* tweaked it to what I had and what I wanted. :) My husband loved it so much that he has "commanded" that I make it again soon.


    White Chocolate Chex
    1/4 box Corn Chex
    1/4 box Rice Chex
    1/4 box Corn Pops
    3 cups pretzels
    1 bag M&Ms (king-size bag)
    1/2 bag (12 oz) blanched peanuts
    3/4 pkg (24 oz) white almond bark

    Mix cereals and pretzels in a large bowl. Dump M&Ms and peanuts on top without stirring--they tend to sink to the bottom and this keeps them front-and-center and ensures that they get a nice coating and become evenly distributed throughout the mix.

    Break the almond bark into the pre-portioned squares and melt it according to the directions on the package. (I melted mine in the microwave. First time EVER melting chocolate-y substances in the microwave that I haven't burned it!) Quickly pour the melted almond bark over the cereal mixture and stir until it's all evenly coated. Spread on wax paper to cool and then devour at will. :)

    If you're making this around Christmas, it's also really yummy with a small amount of super-finely crushed candy cane sprinkled over it.

    Note: My husband has a HUGE sweet tooth, so he has requested commanded (his words, not mine!) that next time I make it (also by command) I use more almond bark so it's a thicker coating and more M&Ms.

    Why we love Chex (part 1)


    Chex is a staple at our house, and, thanks to my developing couponing skills, we can even buy the real Chex (although the generic version are almost as good, in my view). We love Chex in almost every version (at least in one way or another). We eat it plain. We eat it with milk for breakfast (or lunch or dinner). We mix it up in trail mixes (since Chex Mix is rarely a good deal...). And, lastly and favoritely, we cover it with sugar and other delectables to make delicious treats, like Muddy Buddies. Since you can get the recipe for Muddy Buddies on the box (or here on my favorite recipes site, just in case you're using Corn Squares instead of Chex :), I'll share with you two different, yummy, and easy Chex treats.


    Grandma Ruth's Chex Snack
    I call this recipe that for lack of anything better to call it! My Grandma (Ruth) used to make this all the time, and it's delicious. Beware -- it makes a huge amount and it's very easy to nibble at, which can ruin many good New Year's resolutions. :)

    1/2 box Golden Grahams
    1/2 box Corn Chex
    1/2 box Rice Chex (or 1 whole box either type of Chex)
    1 cup coconut
    1 cup almonds or peanuts

    Mix in a large bowl and set aside. Be sure the bowl is large enough for you to stir the syrup on to the mixture quickly without making a mess, so that you can easily stir it all together before it solidifies.

    In a saucepan, combine
    2 cups sugar
    2 cups corn syrup
    1 1/4 cups margarine

    Bring to a boil and boil hard for 2 minutes (to a point somewhere between soft ball and hard ball stage, I'd guess). Pour over cereal (be careful and don't let the syrup burn you!) and stir, stir, stir until the mixture is evenly coated. Spread on wax paper or cookie sheet and let cool. Store in air-tight container, unless you prefer it to be more crunchy than soft -- then you can leave it out and let it harden up some more.

    Meatball Monday

    My husband loves meat. Meat can get expensive. Pasta is cheap. Spaghetti sauce is mostly cheap. Thus was born at our house Meatball Monday.


    (These are not my meatballs, but they could be!)

    Every Monday we have spaghetti and meatballs. Hubby loves it because he gets meat. I love it because I can make one very large batch of meatballs and freeze them. Reheating them is as simple as tossing the meatballs in the sauce to simmer for about 20 minutes. Easy Monday meal means there's a better chance that we'll put some thought into our Family Home Evening. Win - win - WIN.

    Monday Meatballs
    (Original healthier recipe from Alicia, unhealthy recipe notes are all mine)

    Mix the following ingredients with 1 whole egg and 2 egg whites (or just 2 whole eggs):
    1 lb ground turkey breast
    1/2 lb lean ground pork
    (Or 1 1/2 lbs of whatever ground meat you have around -- turkey, sausage, hamburger...) 
    1/2 cup Italian bread crumbs
    1/4 cup grated parmesan cheese (or more!)
    Add:
    1/4 cup milk
    2 tsp Worcestershire sauce (or more!)
    3/4 tsp salt
    1/4 tsp fresh ground pepper (or more!)
    Minced onions, to taste
    Garlic powder, to taste
    Mix well and roll into balls (just smaller than a ping pong ball). Place on cookie sheet, not touching. (Because we use fattier meats, we place our wire cooling rack on the cookie sheet and place the meatballs on that to allow the fat to drip off.) Bake at 350F for 20 minutes, until lightly browned. Add to simmering sauce for 20 minutes. Serve and enjoy!
    Related Posts Plugin for WordPress, Blogger...
     
    Blogging tips