

I practically never post twice in one day, but I want to give you the rest of the instructions for the felt game board in a timely manner and if I don't post them today, they might end up forever in the
So, finishing up the felt game board tutorial: making the pockets and straps and assembling the board.
See part one for materials list and instructions for the board and game piece assembly.
Make and decorate the storage pockets
1. On one of the two full sheets of felt you've saved for the pockets, make a small mark at 6" along the shorter (9") edges of the felt sheet.

2. Fold the longer (12") edge of the felt sheet up to that 6" mark and mark the center of the 12" edge.

3. Sew a straight line from the bottom folded edge up to the center mark.
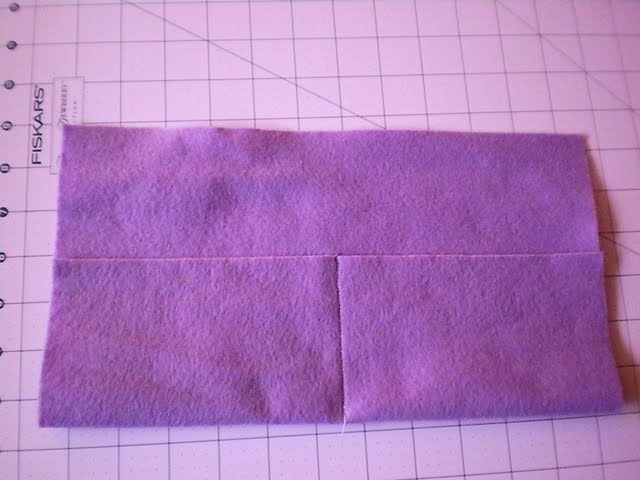
4. Cut from the center of the top edge to the center mark to create two flaps for the two pockets.
5. Measure and mark 1" from each side of each of the flaps on the raw edge; draw a diagonal line from the mark to the edge of the flap and cut along that diagonal to create a trapezoidal flap shape for each flap.

6. Repeat steps 1-5 with the other full sheet of felt to create another pair of pockets.
7. Fuse the small Xs and Os like this and the two remaining circles like this to decorate the pockets:

8. Topstitch each decorative piece in place.
9. Fold each flap in half and cut a small slit to be a buttonhole.

- You may want to sew an actual buttonhole or reinforce the buttonhole by sewing a small rectangle around it.

Make and decorate the straps
1. Take each of the 3"x12" felt pieces, fold the two long edges to the middle, and zigzag down the middle.

2. Topstitch, using a straight stitch, around 3 edges of each strap -- the two long edges and one of the short edges.
3. Attach (sew) the hook and loop tape on opposite sides of the two ends of each strap, with the stiffer half (the hooks) about one inch from the un-topstitched end and the softer half (the loops) on the other side of the strap and right at the edge of the topstitched end.

4. Add buttons or other embellishments as desired.

Assemble the game board
I fused and then sewed the pockets to the gameboard, but I would suggest sewing and then fusing... and then sewing again if you feel the need. I'll give you the instructions for what I suggest instead of what I did, so the pictures are missing a few seams here and there. I hope you'll forgive me :)
1. Take the checkerboard pocket (the one with the circles) and the checkerboard and lay them like this, with the flap open and the top of the pockets at the bottom of the board:

2. Gently fold, without creasing, the fusible web up (to keep it from being stitched through) and stitch along the lower edge of the pocket flap, just above the top of the pocket, to attach the pocket to the edge of the checkerboard.

3. Fold the fusible web back down and iron to fuse to the backs of the pockets.
- You can either iron from the webbing (paper-covered still) side with a press cloth or by gently sticking the iron in the unsewn side or open top of the pockets.

- All that topstitching on the checkerboard makes the paper removal a real adventure... I ended up cutting a small hole in each square to help peel it off.

5. Lay the tic-tac-toe board and its pocket (the one with the small Xs and Os) like this, with the flap open and the top of the pockets at the bottom of the board:

6. Stitch along the lower edge of the pocket flap, just above the top of the pocket, to attach the pocket to the edge of the tic-tac-toe board, just like you did with the other pocket in step 2.
7. Lay the tic-tac-toe board/pocket combo piece on top of the checkerboard/pocket combo piece on the ironing board, matching up the pockets and tucking the two straps in at the top (be sure the straps and velcro are facing the same direction).

8. Iron and fuse the entire gameboard -- the pockets and the two gameboards. Be careful around any buttons!

9. Hold the straps in place (since the webbing doesn't do that very well) and topstitch around all four edges of the rectangular game board, starting with the top where the straps are. When you reach the pockets, you'll sew all 4 layers of pocket together to close the sides and secure the bottoms.

- At this point, you might also want to re-stitch the top of the pockets to the gameboard (like you stitched in steps 2 and 6). Just be sure not to sew the flaps down in the process.
11. Fill the pockets with their corresponding game pieces.

12. Roll the board up, secure with the straps, and go!

I loved this felt game board so much that I made another, more age appropriate version for my favorite 2-year-old for her birthday. Tutorial coming soon. :)


2 comments:
You write the best tutorials, Lu! Great game board and your tree earrings are really cute. :-)
that was a great step by step project- it was my first project using my new sewing machine-- I hope my niece likes it
Post a Comment