


This game board is easy on your wallet (around $5 depending on your choice of materials and selection of on-hand) and easily customizable for boys or girls. The board features tic-tac-toe on one side and checkers on the other. Pieces are stored in attached pockets and then the entire board rolls up for on-the-go play or stuffing in a stocking. Want to make one? Here's how I did it:
But first... yes - I know that there are probably easier ways to achieve what I've done here. I do things to meet a vision and that vision doesn't always coincide with simplicity. Usually simplicity smacks me in the face halfway through, or occasionally after, completing a project. If you would like to be the hand of simplicity (the one that smacks me), feel free to leave me a comment. :)
Felt Game Board
for personal, non-commercial use only
What you'll need:
- 1 - 12" square of felt for the tic-tac-toe board (with 1/3 of a yard of 72" felt you'll be able to make 4-6 of these babies, depending on if you use yardage or felt sheets for the straps)
- 2 - 3"x12" felt pieces for the straps
- 2 - 2" pieces of sew-in hook and loop tape (velcro)
- 4 - 12" lengths of grosgrain ribbon, with the ends either heat-sealed or fray-checked
- 2 full sheets of 9x12 felt for the pockets to store the pieces in
- 2 to 4 full or partial sheets of felt for the game pieces and checkerboard
- appx 3/4 yard of fusible web, like WonderUnder or HeatNBond
- 1 - 12" square of contact paper (you can find a roll of it at the dollar store!)
- Printed game pieces pattern
- 4 to 49 buttons (4 required, 45 optional - I used them because that was my vision, but my nieces never use the buttons when they play :)
- Sewing supplies: iron, sewing machine, needle and thread
What you'll do:
Make the tic-tac-toe board
1. On the 12" square of felt, make small marks at 4" and 8" on all 4 sides.

2. Lay one ribbon straight across from one 4" mark to the opposite 4" mark and sew it down.

3. Repeat with the other ribbons, sewing them at the perpendicular 4" mark and the two perpendicular 8" marks, to create a tic-tac-toe grid like this:

4. (optional) Sew one button in the middle of each square:

Make the checkerboard
1. Cut two different colors of felt into 18 - 2" squares, for 36 squares total.
2. Peel the paper off your contact paper to expose the sticky side. (I peeled the paper back in two sections.)

3. Starting at one corner, gently stick the felt squares to the contact paper, alternating colors to create a checkerboard:

4. If needed, trim the edge squares so that the whole board is more perfectly square.
5. Cut a 12"x18" piece of fusible web.
6. Place the pieced-together checkerboard with the contact paper down on your ironing board.
7. Place the fusible web, fusible side down, on top of the checkerboard, lining up the 12" edge and leaving about 6 inches overhang on one end.

8. Iron and fuse the fusible web to the felt. You'll probably want to use a lower heat setting for a longer time than the instructions on the package suggest to avoid melting the felt.

- I'd suggest doing a test-iron with scraps of felt and contact paper to be sure that your contact paper won't melt.
- You may also want to use a press cloth to ensure that you aren't melting the felt. I didn't use a press cloth, and I ironed at a higher temperature, but I slightly melted my felt because I'm impatient like that. :)
10. Use a zigzag or other joining stitch to top-stitch the checkerboard squares.

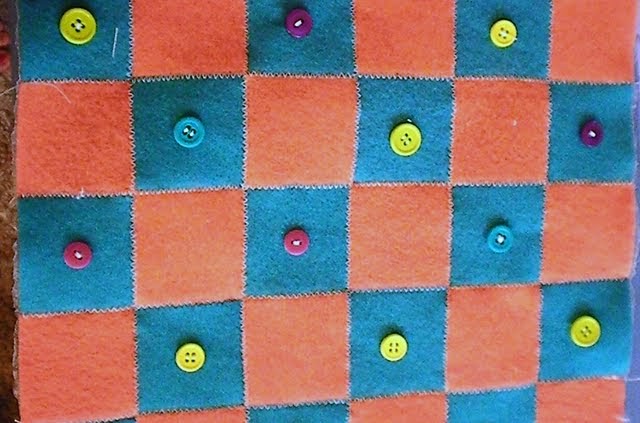
11. (optional) Sew a button in each checkerboard square:
Make the game pieces
I chose to make double-sided game pieces for both games and show that here. To make single-sided game pieces, just cut the suggested pieces from felt (I'd suggest a freezer paper stencil), and skip the entire fusible webbing and top-stitching bit.
1. Print the game pieces pattern.
2. On the paper side of the remaining fusible web, trace
- 5 large Xs
- 2 small Xs
- 5 large Os
- 2 small Os
- 14 circles
- 12 crowns
4. Iron and fuse the traced shapes onto your felt, making sure that the large Xs and Os are different colors, that the two groups of circles are different colors, and that the each small X and O is a different color (to coordinate with the two different colors that the large Xs and Os will be when double-sided).

- Be sure that you are reserving two full sheets of felt for the storage pockets (instructions in part two of the tutorial).

6. Set aside the small Xs and Os and 2 circles, one of each color, to be used for pocket embellishments (instructions in part two of the tutorial).
7. Peel the paper from each crown and fuse each crown to one of the circle pieces.

8. Secure the crown by stitching a few stitches in the center of the crown.

9. Peel the paper from the fusible web on the pieces -- 5 large Xs, 5 large Os, and 12 circles with crowns -- and fuse each piece to another layer of felt. Fuse the Xs and Os to a different color of felt and the circles to the same color of felt.

10. When the fusing has cooled, cut out and top-stitch each piece, sewing around the edges of the circles and Os and an X shape on the Xs.
11. (optional) Cut buttonholes in each piece:

And that's it for now... Check out Part 2 to finish up: making the straps and pockets and assembling the game board.
Have a wonderful day!


and so flattered to be featured at


3 comments:
Oh my friend!!! This is absolutely ADORABLE and a perfect Christmas gift!! I am quite impressed... amazing tutorial!
This is such a cute idea, and I absolutely love how vibrant the colors are. Great job!
I love the tic-tac-toe, and know my son would think it's awesome too! I hope to make one someday :)
I posted a link to your tutorial on my site:
http://itssewforyou.blogspot.com/
Post a Comment