Stashbusting + guest posting

Today I take the oath of a stashbuster:

"Neither snow nor rain nor heat nor gloom of night stays this crafter 
from the sworn diminishment of her appointed stash."


Okay, I may have my oaths a little confused, but here's the gist of Stashbusting September, so graciously hosted by Robin of The T-Shirt Diaries:

Craft for an entire month 
with only the supplies 
that you have on hand 

{and in my head I add "or that you can beg, borrow, or steal-with-forgiveness/permission from your known crafting associates"}

You can read the full oath of Stashbusting September plus some FAQs (and join!) over at The T-Shirt Diaries. You'll want to join. All the cool kids are doing it. Plus, if just a few more cool kids join, Robin will add another prize to the kitty.


In other news... It's Wednesday! Pop by my weekly guest post at Housewife Eclectic to find a reason to celebrate today. And tomorrow. And next week. And next month. :)

Some etsy lovin'

Update 9.1.10 -- I WON! I WON! I WON I WON I WON! Behold the power of positive thinking. :) Don't worry, I'll share... maybe...

CraftGossip is giving away three $100 shopping sprees to buy anything you want from any and all etsy shops. How great is that? (If you want a chance to win, check out the details here.)

Etsy is the most wonderful place to find products and inspiration! Just today, I found the Pounce feature. Click on Buy and then Pounce to see a handful of random shops that have either just sold an item or just opened/listed an item. Love it!

Here's my wishlist for if when I win the $100 shopping spree (because I can feel it... this is mine to win!)

 peek-a-boo giclee print from Papers Edge ($31)

loves language fine art print from Honey Tree ($30)

small fry necktie pattern from Little Lizard King ($5.75)

red coral drop earrings from Simply EC ($10)

earthly set of neckties from Creative Kismet ($3)

two yards red apple oilcloth from Oilcloth Addict ($15.50)

antique silver charms from Rock Chix Supplies ($4)

Fantastic stuff, eh? Can't wait until I win (just letting the power of positive thinking work for me ;)

Happy Tuesday!

Easy Graham Cracker Pie Crust

We are a graham cracker pie crust family. There are two very good reasons for this:
  1. I am afraid of making traditional pie crust and too cheap to buy premade pie crust.
  2. We don't really love traditional pie crust... but we love the buttery goodness of a graham cracker pie crust!
The Mr loves pudding pies. And cheesecake. (We both do!) Pretty much any pie or any filling or any dessert-stuff can be put on a graham cracker crust and be marvelous. (Fruit pies may be an exception, but we don't really eat cooked fruit at our house either...)

My grandma made the most delicious no-bake cheesecake with divine graham cracker crust. I'll share the cheesecake recipe later, but here's Grandma's recipe for the best-ever graham cracker crust.

Grandma's Graham Cracker Crust
makes one 9x13 crust or one pie crust

What you'll need:
  • 2 packages graham crackers (or appx 2 cups graham cracker crumbs)
  • 8 Tbsp (1/2 cup) butter or margarine, melted
  • 1/4 cup sugar
If you need more or less crust for different pan sizes, adjust the amount of crackers/crumbs to what you think you'll need and then adjust the butter so that you have 1 Tbsp for each 1/4 cup of crumbs. Err on the higher side, because once you add the butter, the game's over -- adding more graham cracker crumbs after that will make your crust unevenly textured... like mine in the photo above. :) The first round of graham crackers soak up the butter, so the second round stays dry. Still edible enough that your family won't notice the difference, but it doesn't look as good for sure!

What you'll do:
  1. Place the graham crackers in a large ziploc bag and crush with a heavy can or a rolling pin.
    • This is my favorite part! An excellent ending to a frustrating day. :)
  2. Place the graham cracker crumbs in a medium bowl.
  3. Add sugar to crumbs and mix well.
  4. Add the melted butter/margarine to the crumbs/sugar mixture.
  5. Stir thoroughly with a fork.
    • The mixture should be well mixed but still a bit crumbly.
  6. Place crumbs in your pan.
  7. Press the crumbs firmly into place using your fingers, a measuring cup, or whatever other tool you deem necessary.
  8. Bake at 350*F for 8-10 minutes or until the crust is just barely toasted.
    • For mini muffin or muffin-sized crusts, cut baking time to 6 minutes or less.
  9. Cool crust completely before adding pie/cheesecake/yumminess filling.  
And now I'm going to tease tantalize you with this delicious cheesecake number... in three flavors... lemon... lime... raspberry... recipe next week... :)

Make your Friday FREE!

Just had to share these two awesome freebies this morning... Kind of funny that I've posted every day this week after my post last week about only blogging when I feel like it. Ironic? Probably. :)

A free 8x8 fabric swatch from Spoonflower. I ordered this print, but you can choose any of their current designs or even design your own. But hurry! The discount (automatically applied at checkout, and including free shipping) only goes until noon EST today. Read more about it here on the Spoonflower blog.

image from Amazon
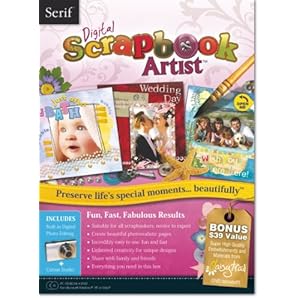
Free Digital Scrapbook Artist from Amazon (more info here on Freebies4Mom). You can also download PagePlus Essentials (info here) Not free trials -- really the free product to download, which are normally $50 each! I'm excited to try DSA out and see if I can actually become a digital scrapbooker...

{update} And there are some more Silhouette giveaways going on! Go enter.. and then agree to share with me if you win ;)

A multi-part Macgyver confession

Get me a shoelace. I'll disarm that bomb.

Elizabeth over at twelve crafts till Christmas has been confessing for weeks. This week it's about her bedleaving (not bedmaking) and its childhood roots. So, I thought I'd join in because Elizabeth is kind of my idol. :)

Remember Richard Dean Anderson?
MACGYVER!

{confession #1} I had never actually watched a single episode of Macgyver. Nor seen a still image. Nada. I knew who Macgyver was because, well, I haven't lived under a rock for the last 20 years (contrary to popular belief). But I'd never actually seen him.

We borrowed the first couple of seasons from my brother-in-law. It's become an extended-family favorite. To the point that my husband was humming the theme song and my 4 year old niece turned to him, her bright blue eyes wide, and said, "Hey! That sounds like Macgyver!" What quality entertainment we are giving the young America. :)

{confession #2} I may or may not have a teeny crush on Richard Dean Anderson. The mullet wasn't his best look, true. But I used to watch Stargate SG-1 (nerd? why yes, I'd say so...) and think that Colonel Jack O'Neill was one good-looking guy (like another fave of mine, a Mr. Leroy Jethro Gibbs. NCIS anyone?). And {confession #3} I just put two and two together tonight that Macgyver and O'Neill are one and the same dreamboat.

Was I the only one missing it? I know I'm not the only one with a crush, teeny or not. ;)


Photos courtesy of rdanderson.com

Yummiest Ever Chicken Salad Sandwiches

*And when I say yummiest ever, I mean the only chicken salad that I will eat, let alone gorge myself on. :)

Chicken salad sandwiches are a summertime staple at our house. They're yummy, healthy (ish), and easy. Plus they seem fancy, so we make them when we have company over and don't want to heat up the house with a real fancy meal.

For me, chicken salad sandwiches are all about texture, so the adjectives in the ingredient list are very important -- the crunch is what makes the sandwich the yummiest ever instead of just good. :)

What you'll need:

2 lbs chicken meat -- the more bones you have (bone-in, wings/thighs, etc), the higher poundage you'll need
1/2 lb firm grapes
1-2 stalks crunchy celery
1 crisp apple
3/4 cup light mayonnaise (real mayo... no miracle whip)
1 tsp garlic salt (to taste)
1 dozen large croissants

  1. Cook and shred the chicken.
    • I always boil my chicken because I can boil a large amount and then freeze whatever shredded chicken I don't need for the current recipe.Then I just have to thaw the chicken for the next recipe.
  2. Let the chicken cool completely.
    • It shouldn't be warm at all when you start adding the rest of the ingredients, so I boil and shred the chicken the night before and let it cool overnight in the fridge.
  3. Stir in mayonnaise, more or less than 3/4 cup depending on how moist you want it... I lean towards the dry side. 
  4. Sprinkle and mix in garlic salt.
    • You want to have enough garlic salt that it affects the flavor of the chicken salad, but not so much that you can actually taste the garlic. If in doubt, use less than you think you should.
  5. Chop apple, grapes, and celery into small pieces and stir in to salad.
    • The portions listed here will make the salad about a 50-50 split of chicken and crunch (from the apples, grapes, and celery), which is just how I like it. Add more or less to your liking.
  6. Chill the chicken salad in the fridge until ready to serve.
  7. Slice each croissant in half and stuff full of chicken salad. 
Delicious! Not only is this yummy, but it's easy. And good for leftovers the next day (although the sandwiches are best if assembled just before eating so the croissants don't get soggy). That is a requirement at our house. Without leftovers, The Mr. is left with PB&J for lunch. :)

    Fabric Covered Frame

    I'm posting over at Housewife Eclectic today -- about something other than nerdy web stuff! :) Come on over to learn how to cover a frame with fabric scraps.

    Happy Monday!

    No-obligation blogging

    I happened up the concept of blogging without obligation a few weeks ago, and I've been mulling it over since then.

    Gut reaction: I like it.

    Secondary reaction (what body part kicks in after the gut? the frontal lobe?): I like it, BUT....

    If you've never heard of blogging without obligation, here are my favorite parts of the informal mission statement. You can read it in its entirety here.

    Blog without obligation...
    • Because its okay to just say what you have to say. If that makes for a long post, fine. Short post, fine. Frequent post, fine. Infrequent post, fine.
    • Because only blogging when you feel truly inspired keeps up the integrity of your blog.
    • Because for most of us blogging is just a hobby. A way to express yourself and connect with others. You should not have to apologize for lapses in posts. Just take a step back and enjoy life, not everything you do has to be “bloggable”.
    Now, back to my gut and frontal lobe reactions (yup, I'm officially naming that second reaction. feel free to spread the word) to blogging without obligation...

    I like it because it's logical. Why blog if you have nothing to say, nothing new to share? I truly and genuinely admire those bloggers, especially craft bloggers, who can post something of substance every day. I am not and probably never will be a post-a-day blogger, or even a consistent-schedule blogger. No apologies or guilt for that.

    I love blogging because I love sharing ideas and meeting people who are genuinely interested in what I am doing. I love followers and do a happy dance with each new follower, but I want followers who genuinely like me and my blog, not those who feel obligated to return a follow.


    I like blogging without obligation, when blogging works for me, when I have something to blog.

    but... I know that a certain amount of blog obligation (blogligation?) is motivating. If I weren't committed (and therefore obligated) to my weekly guest post over at Housewife Eclectic, it wouldn't happen. But knowing that I have an obligation to fulfill gives me focus. And I love those posts. They are some of my best blogging work because I have to plan and think about them and I want them to be meaningful to readers, not just drivel to skip over in the blog reader.

    And I do think it's natural to feel at least a little bit obligated to practice the golden blogging rule: blog unto others as you would like to be blogged. Er, maybe that should just read publish what you would like to read. Personally, I like projects and explanations, good family recipes, and things that make me laugh. So, I try to post those things.

    so... I embrace a compromise. Henceforth, I will blog with limited obligation. I don't ever want to feel guilty for not blogging, so... I won't. That I can control. :)

    I will blog when it works for me, when I have something of substance to post. But I am obligated to only publish what I would like to read.

    (: The End :)

    Beach Rock Souvenir Collage

    For part of our family vacation and reunion this year, we went to the beautiful (and windy) Oregon Coast (more info in this post). As we walked down the beach, I loved finding these beautifully smooth black rocks. So, I (with a few little helping hands) gathered a pocket(or two)ful and brought them home with this project in mind.

    Of course, once the rocks were home and dry, they weren't that beautiful jet black anymore. Luckily, spraying the rocks with a clear varnish can very nearly duplicate the wet look. :)

    Want to make your own rock souvenir? Or maybe you just want a better way to display your your kid's rock collection (because I certainly do not still have a rock collection sitting in my closet...). This project is easy, but takes some time and waiting and patience.

    Time spent creating: 2.5 hours (not including waiting-to-dry time. or driving-to-the-beach time!)
    Money spent: $8 for spray varnish and E6000 -- free if you already have those on hand!

    What you'll need
    • Rocks, all sizes, rinsed thoroughly
    • E6000 industrial strength craft glue
    • Crochet thread, like you would use for a doily
    • Heavy laundry starch spray
    • Matte ModPodge
    • Matte clear spray finish (I used Krylon)
    • Toothpicks (for fine-tuning)
    • Foam paint brush
    • Cookie sheet 
    • Spatula
    • Newspaper
    • Ironing board
    • Steam iron
    • Straight pins
    • Scissors
    Tutorial, the short version: Arrange and glue spray-finished rocks in your chosen collage shape. Arrange, starch, and glue crochet thread to form the word of your choice. Frame and enjoy.

    Tutorial, the numbered real version
    *This is how I did it... which is not usually necessarily the best or easiest way. I've included some "do as I say, not as I did" steps as well. :)

    PART ONE: Creating the rock shape
    1. Draw or trace your desired collage shape on a piece of paper and cut it out.
      • Make at least two copies. Trust me. :) (Step one and there's already something that I'm telling you to do that I didn't do...)
    2. Cover the cookie sheet with newspaper and place your paper shape on the newspaper.
    3. Arrange your rocks in the collage shape so that you'll know they fit. Think of it as a "green" jigsaw puzzle.
    4. Carefully transport rocks outside and spray with clear finish. I gave my rocks two thin coats to give them a nice wet-looking sheen.
      • Keep the rocks laid out in your collage, if at all possible. That will make it so much easier to glue them in the same arrangement as you laid them out.
    5. While the rocks are drying, take the second copy of your shape and trace it very lightly in pencil onto your shadow box back piece (the one that goes right in the frame).
      • If you plan to re-use the shadow box later, you'll want to find and cover another material to serve as the backing and to glue your rocks to. (That's another thing that I didn't think about until too late.)
    6. Once the rocks are completely dry, begin gluing them to your backing, one by one using E6000. Use a toothpick as needed for positioning.
      • Very important! Be sure to erase the penciled line in sections just before you glue the rocks.
    PART TWO: Creating the crochet thread word  (inspired by MADE and peace love crafts) Please note than an extra measure of patience is required for this part of the creation process. :) The method I chose for forming the letters is long and complicated, but it was exactly what I wanted in my crazy perfectionist head. Unless you are also crazy like me, try another method, like those listed at the end of the post. :)
    1. Trace or write the word(s) you want to frame with your collage. I used a font from my computer because my cursive handwriting is not pretty at all.
    2. Carefully cut closely around the traced word(s) (which I did not do until later) and place your trimmed paper on your ironing board.
      • If you don't want your ironing board cover drenched with starch, place a cloth underneath the paper.
    3. Pin the crochet thread to the paper and ironing board, following the shape of the letters.
      • Place the first pin a quarter inch or so from the end of the thread, not right at the end. The tension as your form the other letters will pull it out and fray the end, and you'll have to start over. :(
      • Another do as I say not as I did (at least not until later): Push the pins all the way down into the ironing board.
    4. Keep pinning. This will take awhile. :)
      • For some sections, I used the pin as a post to wrap the thread around instead of putting the pin right through the thread.
      • Use a toothpick as needed to get the thread in the right place.
    5. When you've pinned the entire word(s), douse (and I mean douse) the thread with laundry starch and allow it to penetrate the thread.
      • If you get impatient at this point and start ironing before the starch has penetrated, you'll have flakes of starch on your painstakingly pinned thread-letters.
    6. Carefully remove the now-soaked paper in small chunks, using a toothpick. 
    7. While you're allowing the starch to penetrate the thread, heat your iron to a high steam setting.
    8. Once the starch has had ample time to penetrate the thread, begin steam-setting the starch. Steam steam steam your painstakingly pinned thread and then gently iron the thread-letters.
    9. Repeat the dousing-waiting-ironing at least once more. I starched twice, but a third or fourth starching would be even better.
    10. Once you are happy with the starching and ironing, dry the pinned letters completely. Just leave them overnight or for the day while you go run errands.
      • If you remove the pins while the starch is still wet, your letters might not hold their shape. Do you really want to have to redo all that pinning because of impatience? I didn't think so. :)
    11. When the letters are completely dry (and I mean completely dry), very carefully remove the pins.
      • It's helpful to use a toothpick to lift up the head of the pin and/or hold the thread in place while you remove the pin.
    12. Apply a thin layer of ModPodge on your backing where you will place your thread-letters. 
    13. Carefully transfer your letters to your backing. This is where my spatula came in handy.
    14. Arrange the letters exactly how you want them using a toothpick.
    15. Cover the letters with a thin layer of ModPodge.
      • This is the time to pinch closed the little holes that the pins may have left in your thread. I just used two toothpicks. The ModPodge helps keep the holes closed.
    16. Apply 1-2 more thin layers of ModPodge, until you feel confident that the letters are firmly attached to the backing and will hold their shape. 
    17. Allow the ModPodge to dry completely (an hour or so) and take a minute to admire your hard work.
    18. Place the backing in the frame.
      • If you adhered the rocks and letters to a backing other than the original backing, this would be the point where you attach that backing to the original backing before placing it in the frame. :)
    Then, all that's left is to decide where to put the frame. For me, this is the most difficult part of the project!

    {update}
    Lovely reader Swati commented: "I am a tad confused about all the extra work that went in making the letters. I should have thought that the simplest way would be to simply use fabric glue to glue the thread on the base. If you are using a different material (ie some other cloth so as to reuse the shadow box later), the word can be stuck before and then ironed as per instructions - and then the rocks go on. Is there any reason why that wouldn't work?"

    My answer: No reason whatsoever! Especially if you are using a different material for the backing, fabric glue would be a much simpler method. It wouldn't have worked for me, unfortunately, because I do not usually think that far ahead. :) I didn't envision the letters until after the rocks were already glued. Also, I wanted to trace the letters (from a font that I loved) and I was using the original shadow box backing, which prevented me from tracing the letters like I wanted.

    Most of all, I got the crazy idea and went for it without thinking about making it easy... If I had, I might have soaked the crochet thread in liquid starch (like these lanterns from Sallygoodin or The Project Corner or this bowl/nest by Stephanie Lynn from Under the Table and Dreaming) and then pinned it (or glued it, like Swati suggests). So many simpler methods to choose from. :) Thanks, Swati!

    So flattered to be featured at
    oneprettything

    Usability 101 + a giveaway

    image source
    Usability 101 continues today over at Housewife Eclectic. I'm spreading awareness for a blogger disease... wysinwyrg (wi-zin-werg). Come learn the symptoms and causes and how to "protect" your readers!

    Also, remember my friend Elizabeth over at twelve crafts till christmas? (read my gush about her here) She has an awesome CSN giveaway going on right now to mark that it's only 4 more months until Christmas... yikes! Enter for your chance to win a $65 gift card. Woohoo!

    Usability 101 @ Housewife Eclectic

    We started last week and we're still going! I'm with Debra over at Housewife Eclectic presenting Usability 101's second segment, Getting To Know Your Readers. Come on over (because you know you blog from your bed somedays... so who's to say your readers don't too?). :)

    Princess Academy {book review}

    Princess Academy by Shannon Hale
    image from bn.com
    Miri is a young girl living in a village on Mount Eskel, an isolated village in a large kingdom. She longs to work in the quarry alongside her father and sister and the other villagers, but her father forbids her because she is too small. One day, a royal messenger comes to the village with news: The king's priests have divined that the prince's bride shall come from Mount Eskel. To prepare, all girls 12 to 18 years of age must report to the Princess Academy to learn to become fit for a prince.

    I loved this book. LOVED it. I would definitely call it a favorite, alongside Ella Enchanted. Princess Academy is a perfect combination of everything I love in a book: a smart heroine who lives and breathes, a realistic setting, a few fantasy/magical elements, and a sweet young romance (because who isn't a hopeless romantic at heart?). I loved the characters and the story and everything about this book. I really cannot express to you how much I love this book! Definitely the best of Hale's that I have read. (See my reviews of the other two that I've read here on goodreads.)

    Final word: A++. I will definitely read this again, add it to my shelves, read it to my children, and recommend it to everyone (at least the women) that I know. I was captivated by the characters and the story.

    Want to see the other books I've been reading? Check them out here on goodreads. I read an average of 3 books per week (some weeks many, many more!) so I only post a few notable reviews here. :)

    Silhouette, my one true love...


    Have you heard of the Silhouette?

    It's a personal electronic craft cutter. Think Cricut. Only better. Here's why it's better:
    1. NO CARTRIDGES TO BUY. This alone is reason enough for my belief that it is better, but I will keep going. Continue to item #2... 
    2. I can use any font in my computer library -- and I have hundreds of fonts because I loooove me some non-standard fonts -- to cut paper, vinyl, heat transfer paper, and more.
    3. It connects right to my computer. For a tech-crafter like me (thanks to Elizabeth at twelve crafts for making tech-crafting an official word), that is a big deal. This is also important to item #2, which is important to item #1, which is the most important of all.
    4. Silhouette has a huge library of inexpensive (think $1) digital designs to download and use. 
    5. A training course. online. 
    And the list could continue, but I'll stop there because writing all of these reasons just makes me want one even more. If you want one too, check out all of these AWESOME giveaways. A $300 Silhouette package, including extra blades/mats, vinyl, and other such goodies. The giveaways all end soon, so hurry!

      Usability Month begins today at Housewife Eclectic

      It's Wednesday (again!), so I'm over at Housewife Eclectic for my weekly Wednesdays on the Web segment. August is (self-declared) Usability Month, so hop on over for some tips on making your blog more reader-friendly. Check out today's post on navigation over at Housewife Eclectic. 
      Related Posts Plugin for WordPress, Blogger...
       
      Blogging tips